At last, I have finally managed to do some Christmas Candy Cane Nails literally just in time for Christmas. One day before isn’t cutting it to close is it? I shared with those of you on my facebook page that I was all ready to do them a couple weeks ago. But then I couldn’t find the cord to my new LED lamp anywhere. The entire day was then spent “cleaning” my office space trying to look for it. I say “cleaning” with quotation marks because it’s that type of cleaning that doesn’t have any purpose. It’s mostly just moving things around unproductively. Do you know what I’m talking about? Do you ever “clean” like that? Well I wasted the entire day doing that and never even found the stupid cord.
This weekend I had finally given up of ever finding the cord for my new LED nail art lamp (that I’ve only used once) again. So I decided to pull out our lead light with the UV bulb which I found works alright to cure nails if I’m desperate, a while back when my old lamp first carked it, in the middle of my manicure. But guess what? I couldn’t find that anywhere! I still have no idea where it has gone but ironically while I was looking for the lead light in the garage I came across… the cord for my nail art lamp. How it ended up in the garage is a mystery but I’m just super glad I finally found it!
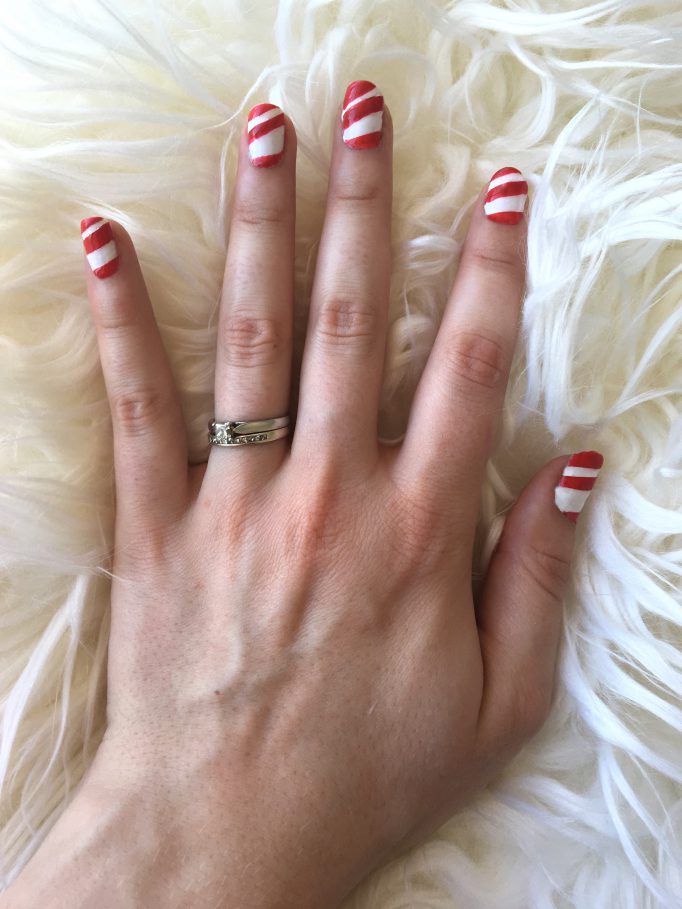
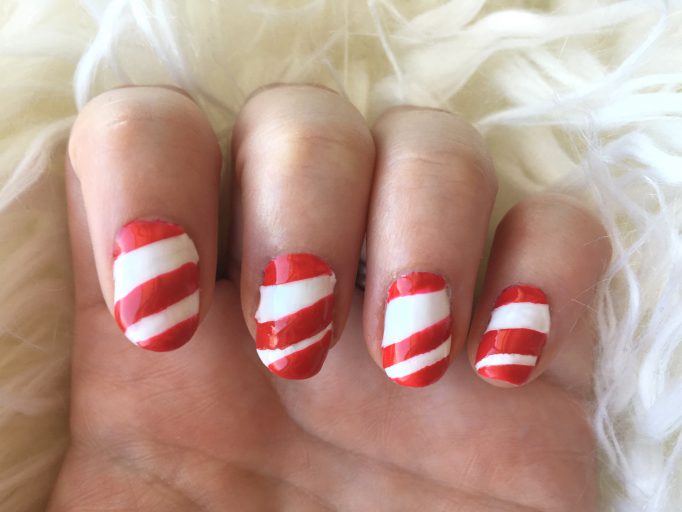
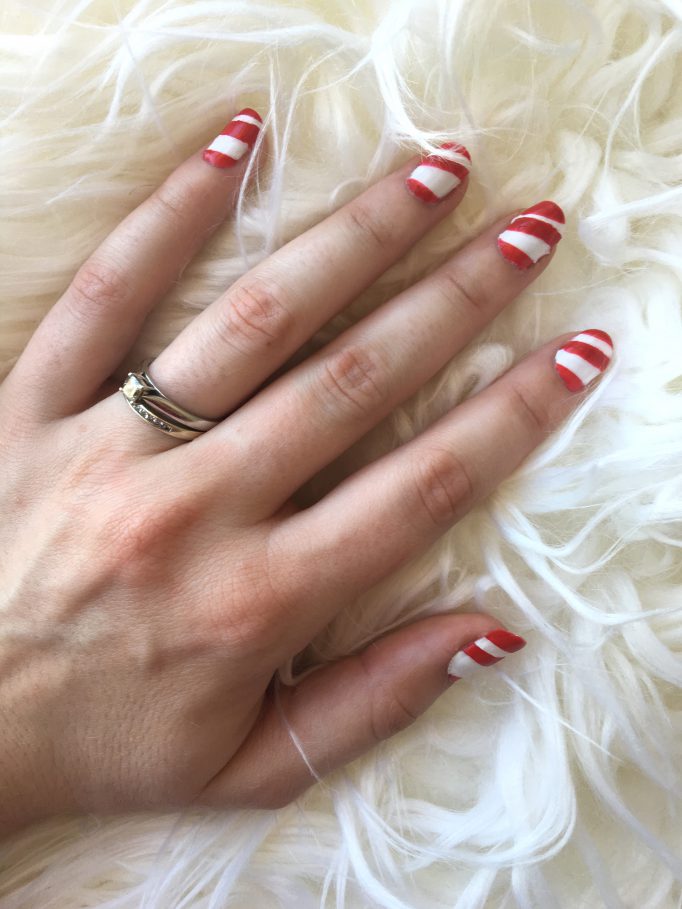
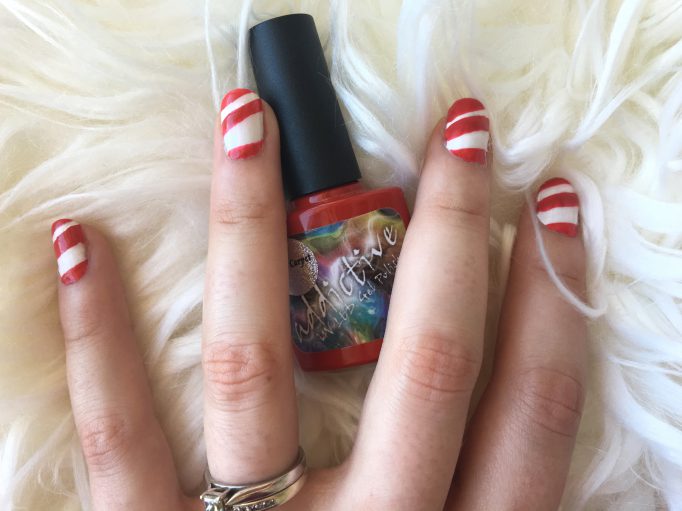
So at last equipped with everything I needed, I managed to create some super cute candy cane Christmas nails to help me get in the spirit all the way down to my fingertips. It was really hard to choose just what kind of Christmas nails I would do this time. I settled with the candy canes because it was nice and easy. I could also get away with wearing them well into the new year. This candy cane nail makeover is a great one for those of you who don’t want to go too Christmasy as the red and white stripes could almost work year round. If you want to get your own sweet candy cane fingertips read the step by step instructions below.
Christmas Candy Cane Nails
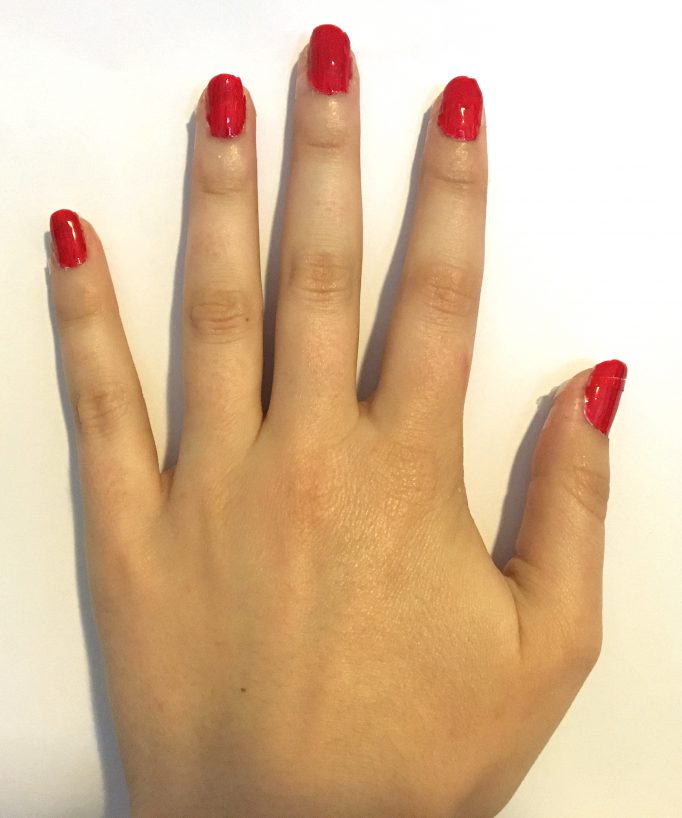
As with all manicures the first steps are of course to get your nails ready for the polish. Push back the cuticles, trim and shape the nails if you want and then start with a base coat. I’m using gel polish so I then need to cure in my 36W LED lamp for 30 secs. Here are my nails with their base coat all ready for the next step.
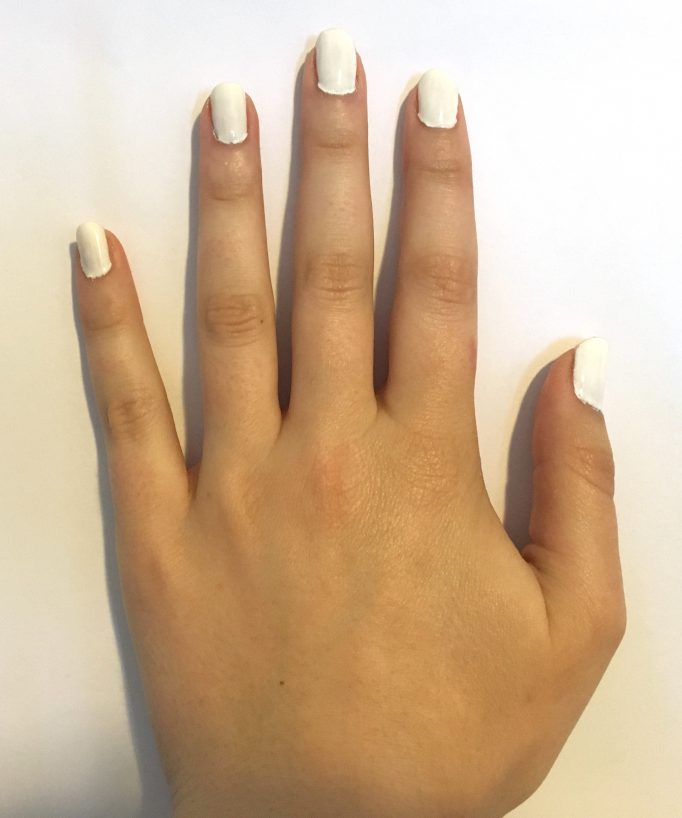
After you’ve cured the base coat, apply as many layers of white nail polish as necessary to get an opaque colour. Don’t forget to shake you nail polishes before using them as sometimes all the pigment sinks to the bottom. I think I did about 3 coats of polish to get my nails a nice bright white. It may be tempting to put on thick coats of lighter colours to try and finish them quicker but thick coats are much more like to bubble later on. Instead apply thin, even coats and cure under the lamp after every coat.
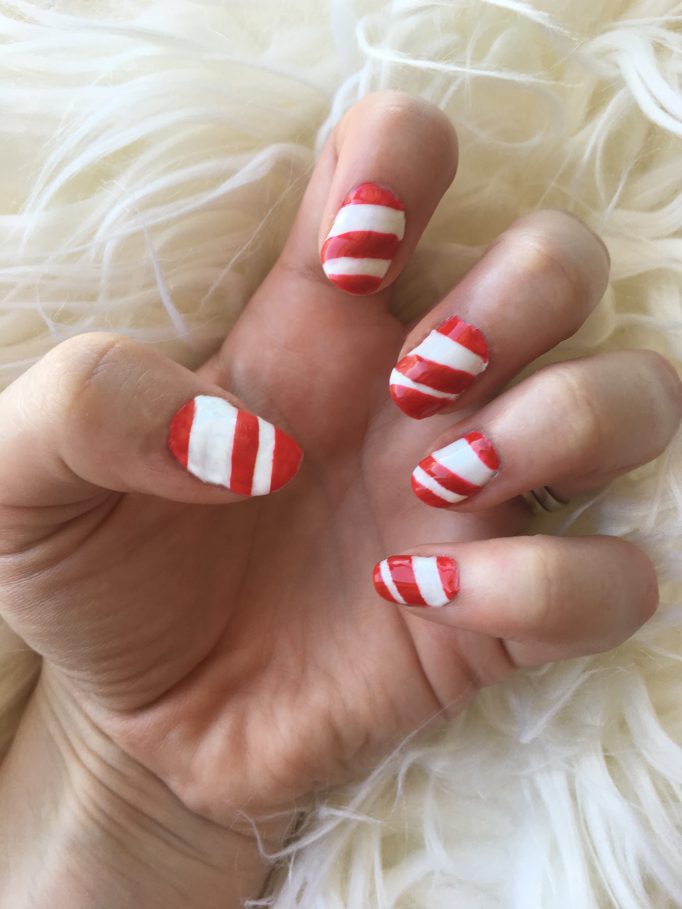
Once you are happy with the colour of your white, cut some pieces of scotch tape into different size strips to place along your nails to create the candy stripes. I choose to do a thin strip and a thicker strip on each nail going in a slightly diagonal direction but you can do all the same size with stripping tape if you’d prefer and keep them straight as well if desired. Stick the strips of tape onto all your nails, making sure it’s firmly pressed down so you don’t get any leakage underneath. Then paint a coat of your red colour over the top and cure. I needed two coats to get a dark enough red.
I found it best to leave the tape on until I had done both coats of red and the nails were finished curing before pulling it off. If you were using regular nail polish it might be best to pull the tape off sooner. As you can see in the below picture, once I pulled off my tape, I noticed there was indeed quite a bit of leakage underneath. 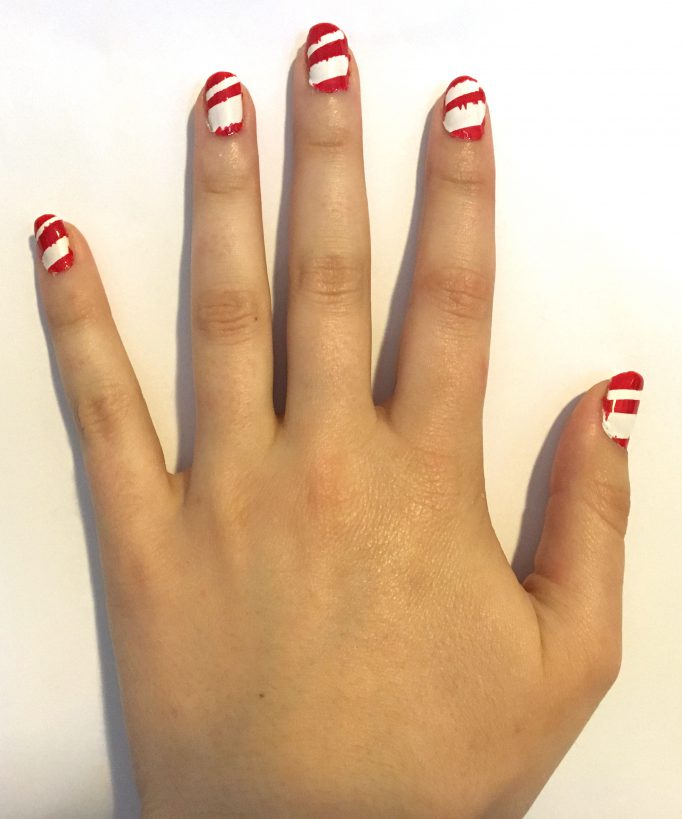
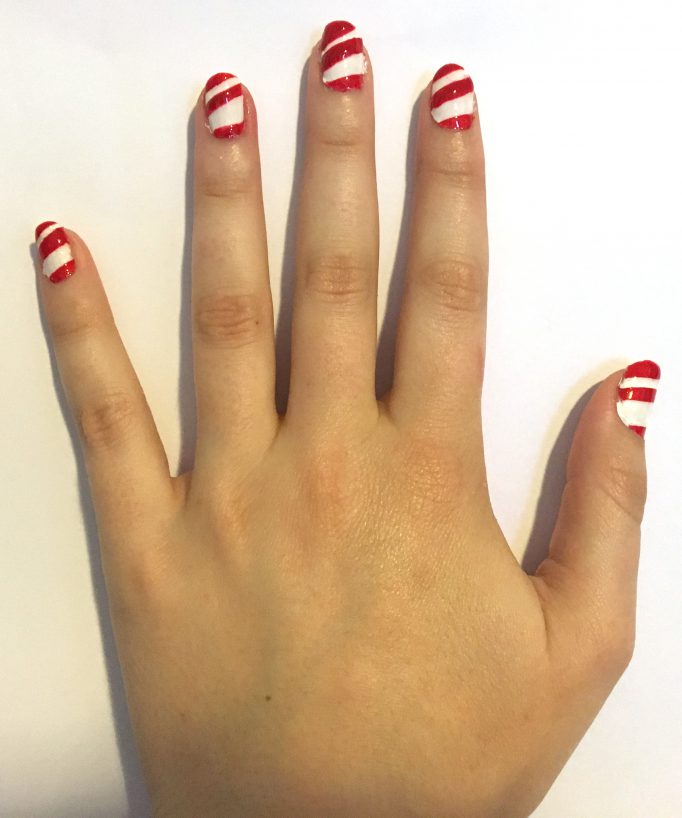
I then went back and tidied up the stripes freehand with some of my nail art brushes until I got them looking more like the picture below. After that all that was left to do was the top coat and the final cure under the lamp. Once your finished, use the KDS cleanser plus to wipe away the sticky residue with a cotton ball or make-up pad and then wash your hands in soapy water. Just like that you have nails that look almost good enough to eat.
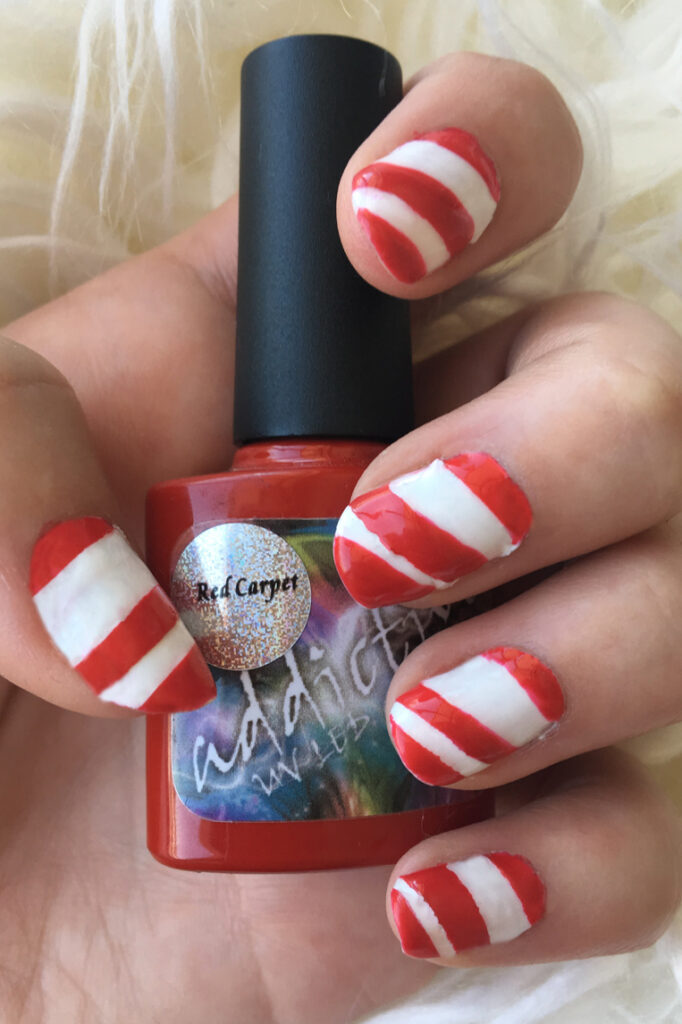
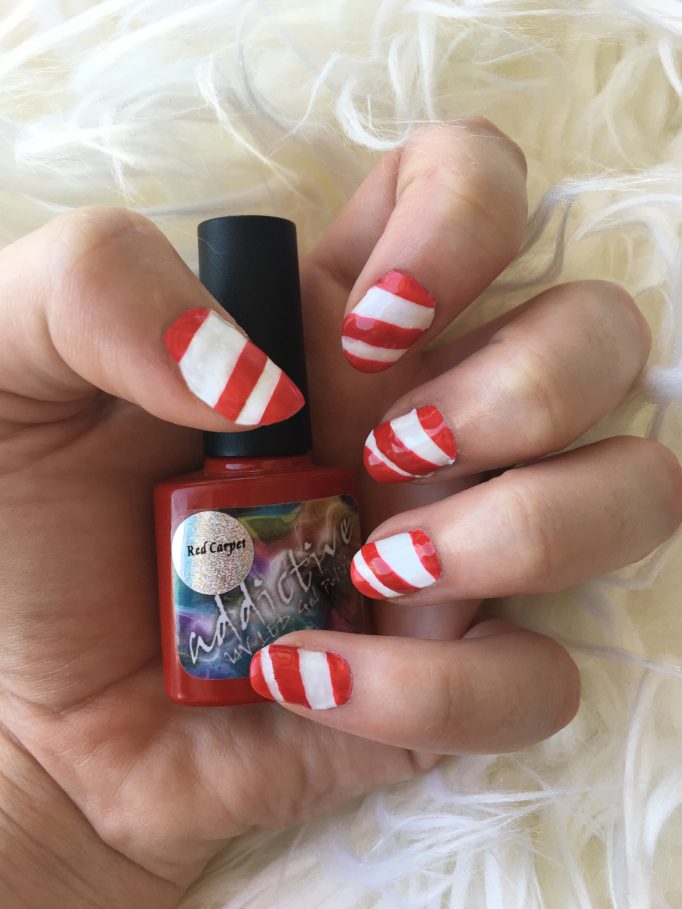
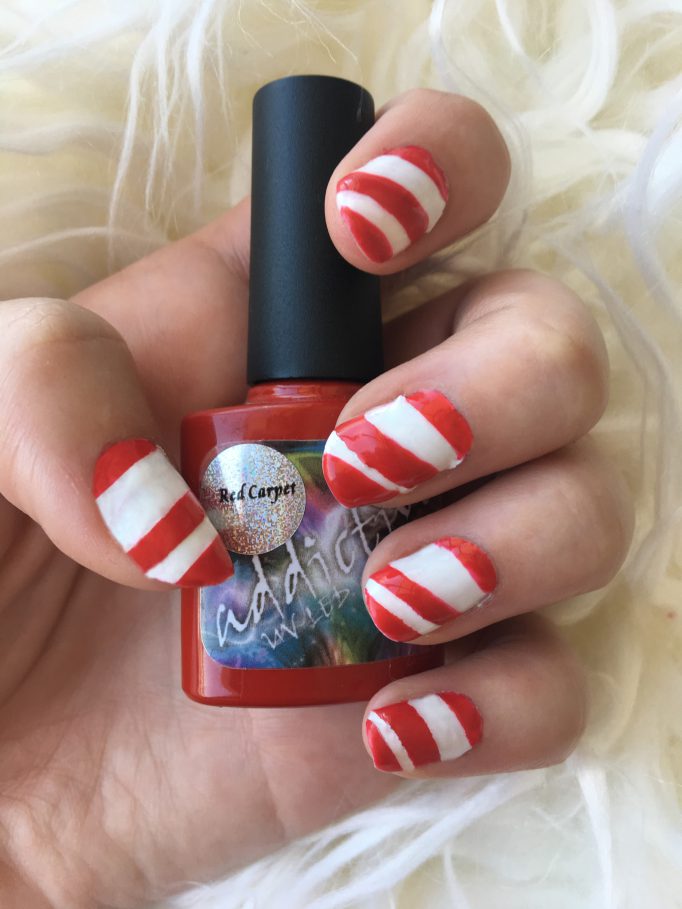
If you are looking for a really easy way to get the red stripey candy cane look, Simply Glamorous Addictive Nails also have a Red Carpet Striping Polish which does all the work for you. I haven’t tried it out yet but looks super cool. If you try it out let me know how it goes. Also if you are looking for a LED nail lamp read about my thoughts on my new 36W one in my last post here.
What I used this week:
– Addictive Top and Base Coat
– Scotch Tape or Stripping Tape
– Addictive French White
– Addictive Red Carpet
– KDS Cleanser Plus
– LED 36W Nail Lamp
There you have it! My candy cane nails are just what I was aiming for. Now I just have to figure out which dress I’m going to wear tomorrow. I hope you all have a very Merry Christmas filled with love and blessings! I should see you back on the blog and the socials before the new year.
Ta ta for now 🙂
")
")
